
软件源安装
https://s3-docs.fd.io/vpp/25.06/gettingstarted/installing/ubuntu.html
安装VPP
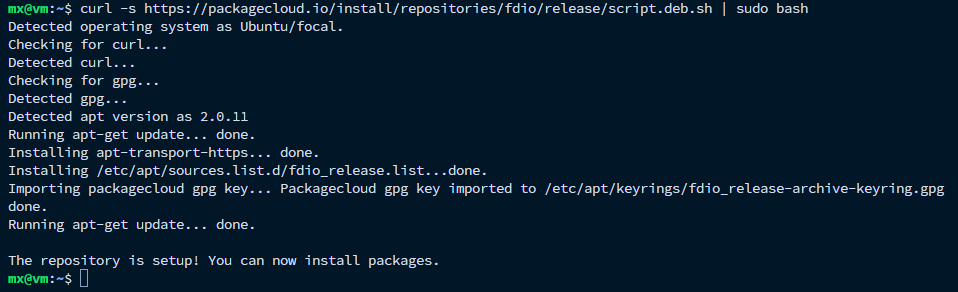
在Ubuntu中更新系统、安装必要工具,并添加FD.io项目的软件源(使用PackageCloud提供的脚本),以便后续安装VPP(Vector Packet Processing)或其他FD.io软件组件。
|
|
|
|
通过运行以下命令安装必需的软件包:
- vpp:主程序,VPP 核心;
- vpp-plugin-core:核心插件,如接口、路由、NAT等;
- vpp-plugin-dpdk:支持DPDK,用于高速数据转发。
|
|
通过运行以下命令安装可选的软件包:
- python3-vpp-api:面向Python 3的VPP API;
- vpp-dbg: 含有调试符号的VPP版本,用于调试;
- vpp-dev:开发头文件和库,适合开发基于VPP的插件或程序。
|
|
普通用户使用vppct(VPP的命令行工具)l需要使用root权限,即使用命令sudo vppctl。若普通用户希望直接使用命令 vppctl运行,可以将需要使用 VPP的用户添加到vpp用户组中(系统会在安装完VPP后,创建一个名为vpp的新用户组 ),随后刷新当前会话以应用用户组的变更:
|
|

测试VPP
vpp.service
当从软件源通过包安装的方式安装VPP后,会自动生成一个名为vpp.service的systemd服务文件,该文件用于定义VPP作为系统服务运行的方式,包括VPP的启动方式、依赖关系、失败重启策略,以及加载的驱动和配置文件位置等。在Ubuntu中可以使用以下命令查看:
|
|
默认vpp.service文件的结构与字段解析:
- Unit段:
- Description:对该服务的简要描述与介绍;
- After:表示该服务在这些服务启动之后再启动,确保网络系统准备就绪;
- Service段:
- Type:定义服务的启动类型,simple是systemd的默认类型,表示服务启动命令(ExecStart字段)不会派生子进程,主进程会直接在前台运行,systemd会一直跟踪这个前台进程;
- ExecStartPre:启动VPP前,加载uio_pci_generic内核模块,也可以选择igb_uio等(前置命令前的
-表示即使命令失败,也不会中止启动流程) - ExecStart:启动VPP的主命令,指定使用/etc/vpp/startup.conf作为配置文件;
- ExecStopPost:VPP服务停止后执行的清理命令,用于删除VPP在运行过程中创建的临时件,可以防止资源残留或下次启动时的冲突;
- Restart=on-failure:如果VPP进程崩溃或异常退出,systemd会自动重启VPP服务;
- Install段:
- WantedBy:multi-user.target表示该服务在系统运行到multi-user级别时(通常是正常的图形/命令行登录环境)自动启动。
|
|
若修改了vpp.service服务文件,则需要重新加载systemd服务配置,并重新启动VPP服务。
|
|
巨页
VPP在运行过程中需要使用Huge Pages来管理大块内存,在安装VPP后,它会自动修改系统的Huge Pages设置,默认会分配1024个2 MB的巨页,共计约2 GB内存空间,配置位于/etc/sysctl.d/80-vpp.conf,并在安装及重启时生效。
|
|
默认80-vpp.conf文件的结构与字段解析:
- vm.nr_hugepages=1024:希望系统预留1024个2 MB的巨页;
- vm.max_map_count=3096:为了满足大页内存映射的需求,max_map_count 要足够大,不能限制VPP进行内存映射;
- vm.hugetlb_shm_group=0:设置允许使用巨页的用户组,0表示所有用户组都可以访问,如果要限制权限,可以将其设置为特定组的GID;
- kernel.shmmax=2147483648:设置共享内存最大值为2 GB,即2147483648字节,与HugePages配置一致,避免在分配共享内存时失败。
|
|
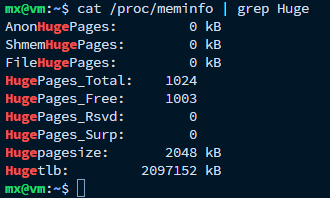
查看系统当前HugePages配置和使用状态,可以观察到巨页已被创建。
|
|
解绑网卡
假设随后VPP需要接管ens34网卡,则需将网卡ens34与Linux内核解绑,并通过lshw工具获知0000:02:02.0为ens34的PCI设备号。随后VPP在启动时会根据配置文件自动完成网卡的绑定。
|
|

startup.conf
根据vpp.service服务文件中的ExecStart字段可知,启动VPP使用的配置文件startup.conf位于/etc/vpp目录。
|
|
需要在startup.conf中添加:绑定网卡ens34(填写PCI设备号)、网卡命名为vpp-eth0。
|
|
重新启动VPP服务,以使配置生效。
|
|
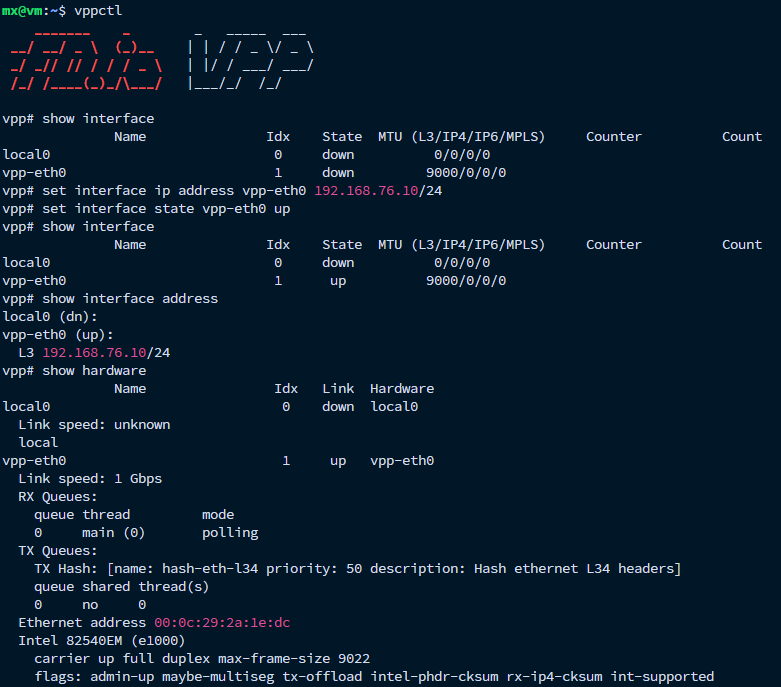
vppctl
vppctl是VPP的命令行接口工具,可用于与正在运行的VPP实例交互、执行管理和配置命令。
|
|
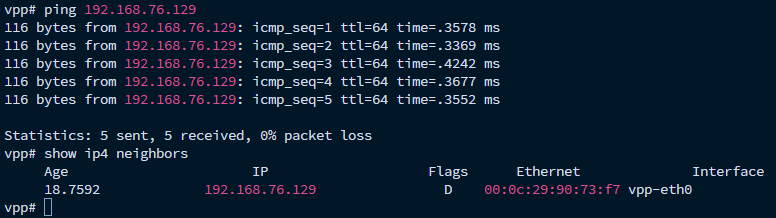
其中的192.168.76.129是该机器通过vpp-eth0端口所连的另外一台机器的IP地址。
卸载VPP
通过运行以下命令可以卸载VPP相关的软件包:
|
|
通过运行以下命令删除由PackageCloud脚本创建的FD.io软件源列表文件:
|
|
源码编译安装
https://s3-docs.fd.io/vpp/25.06/developer/build-run-debug/building.html
源码编译
在编译安装VPP之前,应先确保系统中未安装任何FD.io VPP或DPDK相关的包,可以通过运行以下命令进行检查,正常情况下应无任何输出。
|
|

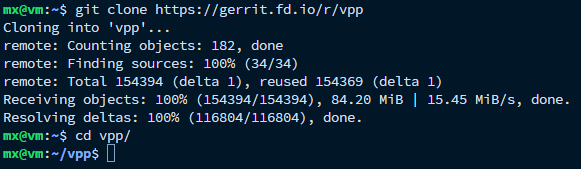
通过以下链接,从FD.io官方仓库克隆VPP的源码到本地。
|
|
使用make命令安装构建FD.io VPP 所需的依赖项,确保系统具备编译VPP源码所需的所有基础环境。
|
|
在构建FD.io VPP时,可以选择编译调试版本或发布版本,两者用途和构建方式不同:
- 调试版本:执行make build命令会构建一个带有调试信息的VPP可执行文件,即在编译过程中保留了符号表和源代码映射信息,便于使用如GDB等调试工具进行故障排查或源码级修改。此构建的可执行文件位于build-root/build-vpp_debug-native/目录;
- 发布版本:执行make build-release命令会构建一个优化后的发布版本,该版本在编译时启用了编译器优化,并去除了所有调试信息,运行效率更高、占用资源更少,适用于生产部署环境。构建产物位于build-root/build-vpp-native/目录。
|
|
在完成VPP的编译之后,仍有部分外部依赖项尚未安装。这些依赖可以通过上一步的make build自动拉取,但只是被安装在 VPP 项目的本地目录中,并不会注册到操作系统全局环境中。为了避免重复下载并确保系统环境具备完整依赖,需要执行以下命令。
|
|
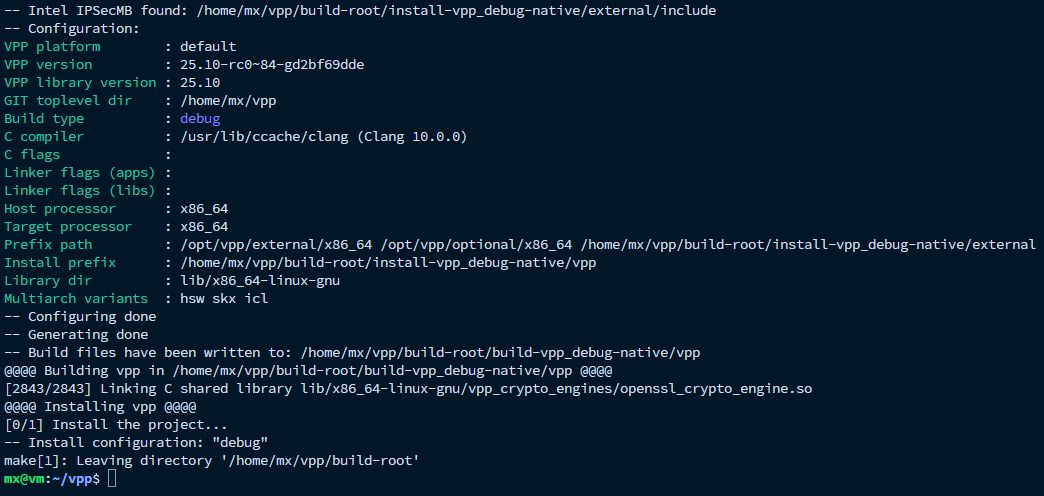
测试编译结果
此时编译将产生多个可执行文件,这些可执行文件可以无需安装、直接运行,根据构建的类型文件位于(调试版本)build-root/build-vpp_debug-native/目录或(发布版本)build-root/build-vpp-native/目录。
|
|
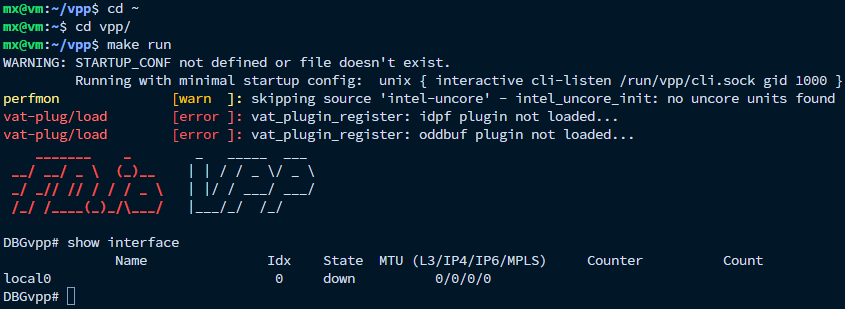
上述命令仅供演示,由于没有指定startup.conf配置文件,因此VPP使用最小化的默认启动配置文件。因此需要创建并指定配置文件,一种简单的方式是直接从编译目录将默认配置文件拷贝出来。
|
|
随后需要将配置文件修改:
- 最小化的默认启动配置文件禁用了DPDK,需要在plugins段中将dpdk_plugin.so修改为enable;
- 添加需要绑定的网卡,并配置内核模块驱动的类型。
|
|
|
|
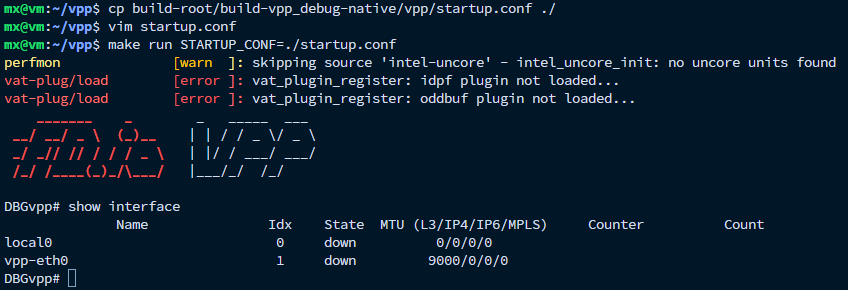
此时即可在指定配置文件的同时启动VPP。注意在启动VPP前,需要先解绑待挂载网卡。
|
|
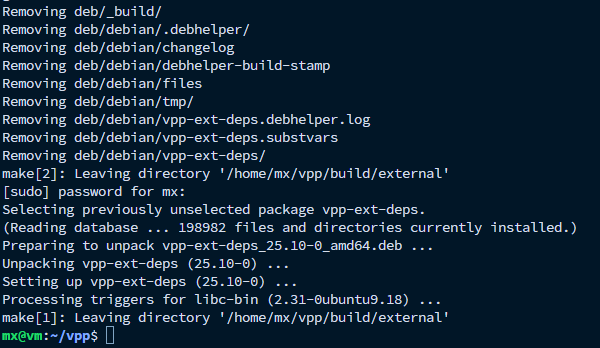
构建Debian包
也可以选择构建生成VPP的deb安装包(此时构建的即为发布版本,构建文件位于build-root/build-vpp-native/目录),执行后将在build-root目录下生成一系列deb文件,可使用dpkg命令安装。
|
|
随后的操作与”软件源安装“一致。
添加自定义插件
https://s3-docs.fd.io/vpp/25.06/developer/plugindoc/add_plugin.html
可以使用VPP提供的插件生成工具make-plugin.sh来快速创建插件模板。该脚本位于./extras/emacs目录中,本质上是一个简单的封装器,调用一系列Emacs Lisp脚本自动生成插件的基础代码结构。
|
|
|
|
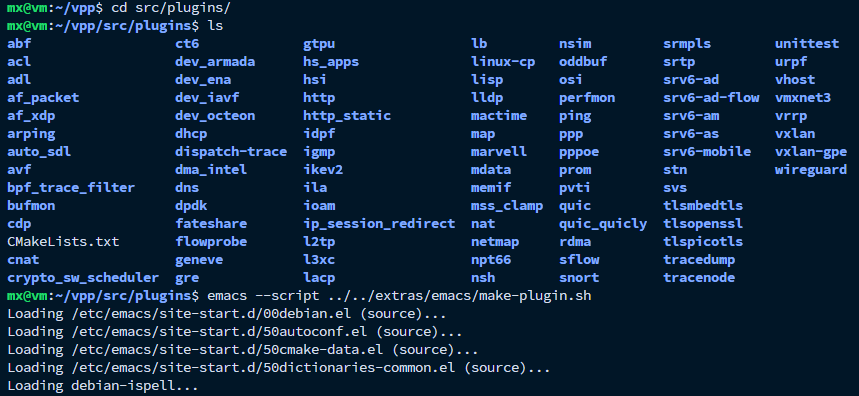
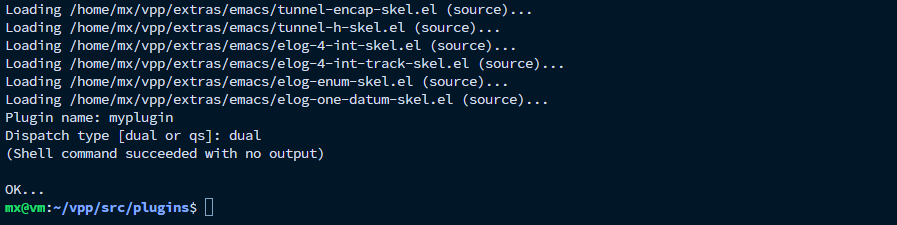
可以观察到插件目录被创建,包含以下文件内容。
|
|

添加或修改完插件代码后,需要返回顶层目录、重新编译整个VPP目录。
|
|
编译完成之后即可运行使用,可查看插件是否被启用。
|
|